
The 3rd

Par 4 | 271 metres

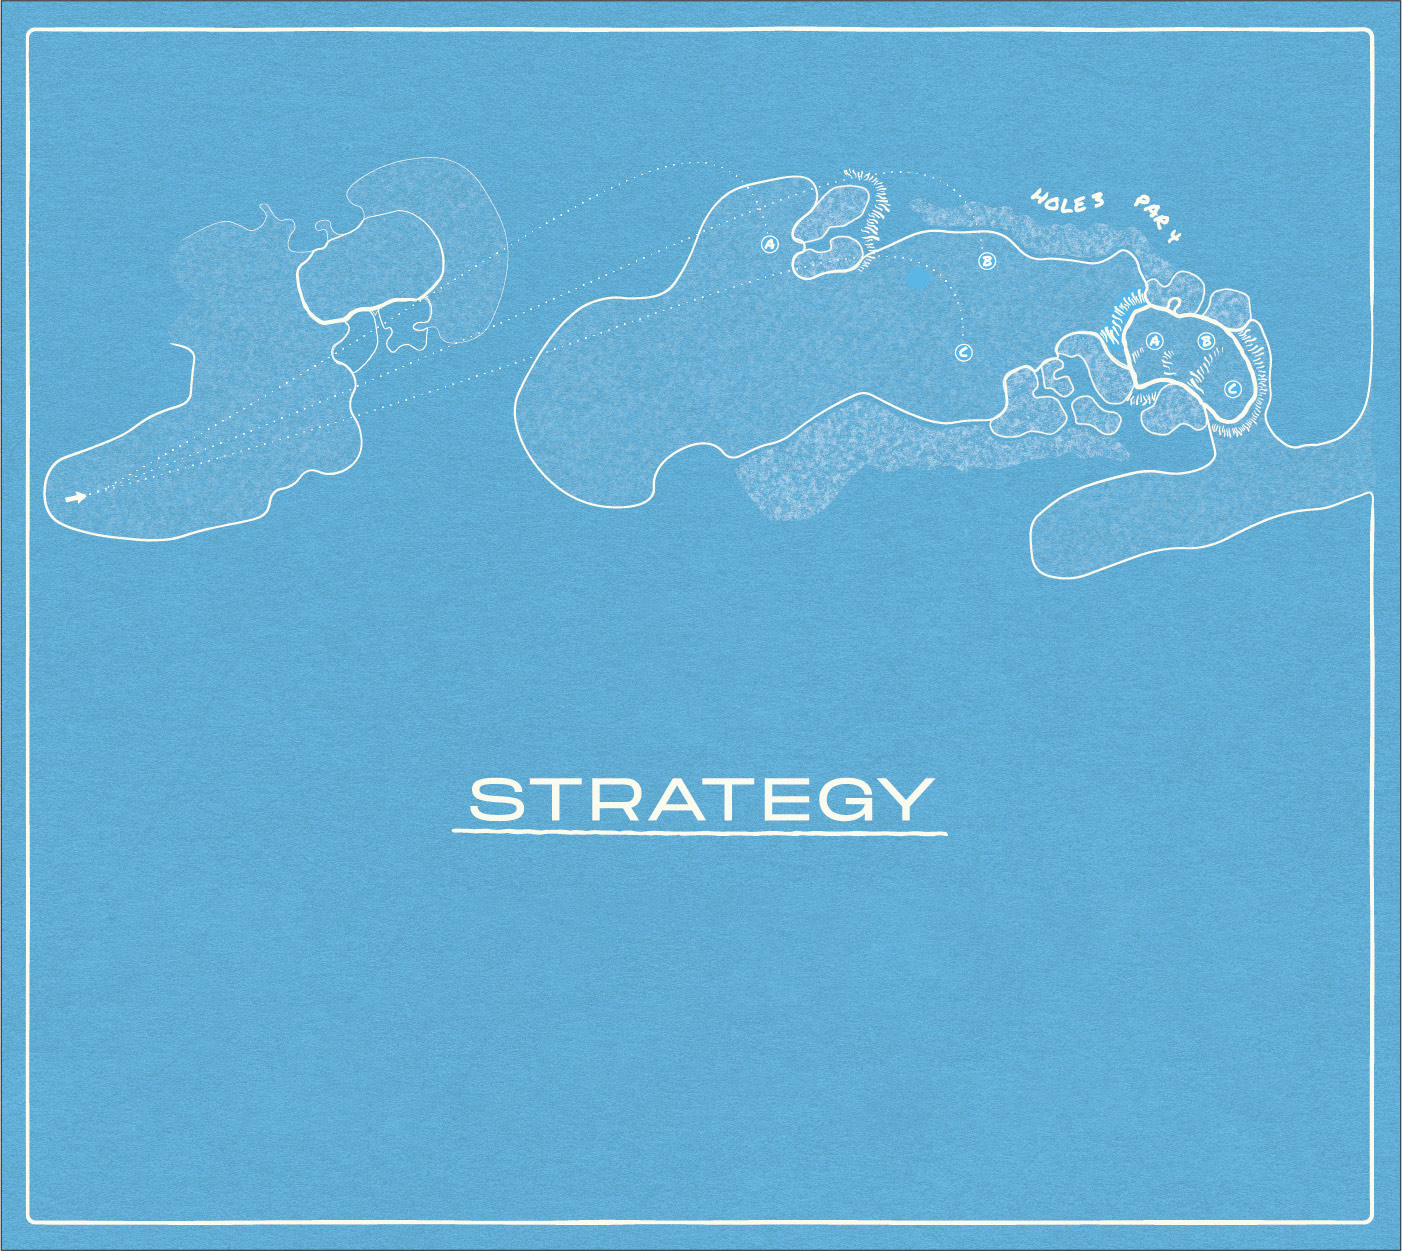
Strategy

Kingston Heath challenges the notion of playing golf one shot at a time. The 3rd hole, in particular, asks you to think backwards from the green. Strategy here begins on the tee, shaped entirely by the flag position. At just 271 metres, the fairway appears wide and open, tempting golfers to attempt driving the green. The hole’s brilliance lies in its deceptive nature—what looks easy plays extraordinarily hard.

If the pin is in Position A, a higher and longer approach from the left side gives you the best angle of attack. Position B calls for a lower, running shot that uses the contours to your advantage, so playing further down the left side is ideal. But when the flag is tucked away in the treacherous Position C, spin control becomes everything. The key is selecting a tee shot that leaves you in your preferred yardage to control spin – though the right angle might offer just enough confidence to carry the front bunkers.
The 5th

Par 3 | 171 metres

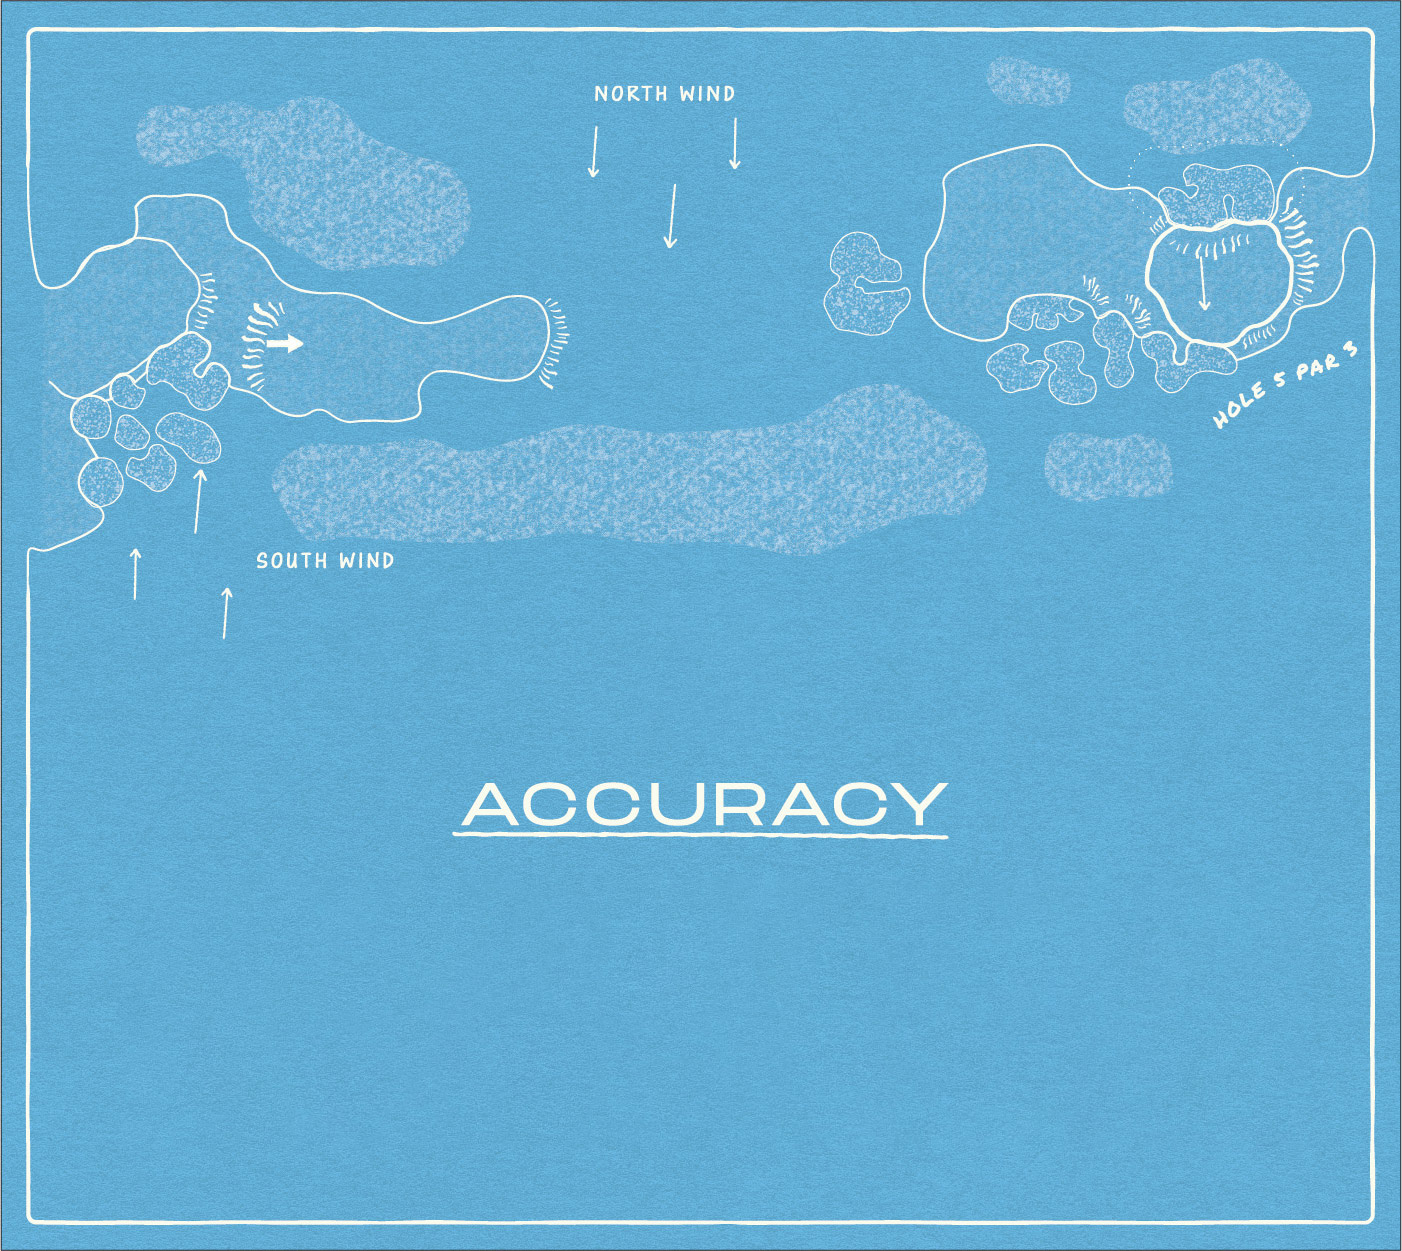
Accuracy

Two main wind patterns rule at Kingston Heath: the hot northerly of summer and the brisk southerly buster. While the par fives generally play with or against these winds, the 5th par three cuts across them.

From the tee, the cluster of bunkers on the right is visually intimidating, but members will tell you it’s missing left that really hurts. A deep bunker hugs the left edge of the green, and the putting surface slopes hard from north to south, making recovery from the left nearly impossible to hold. When caught between clubs, most locals will take the shorter one, preferring a miss to the front rather than risking the back. While this is one of the most photogenic par threes on the course, especially in spring when the heathland blooms, it rewards precision over postcard moments.

The 9th

Par 4 | 328 metres

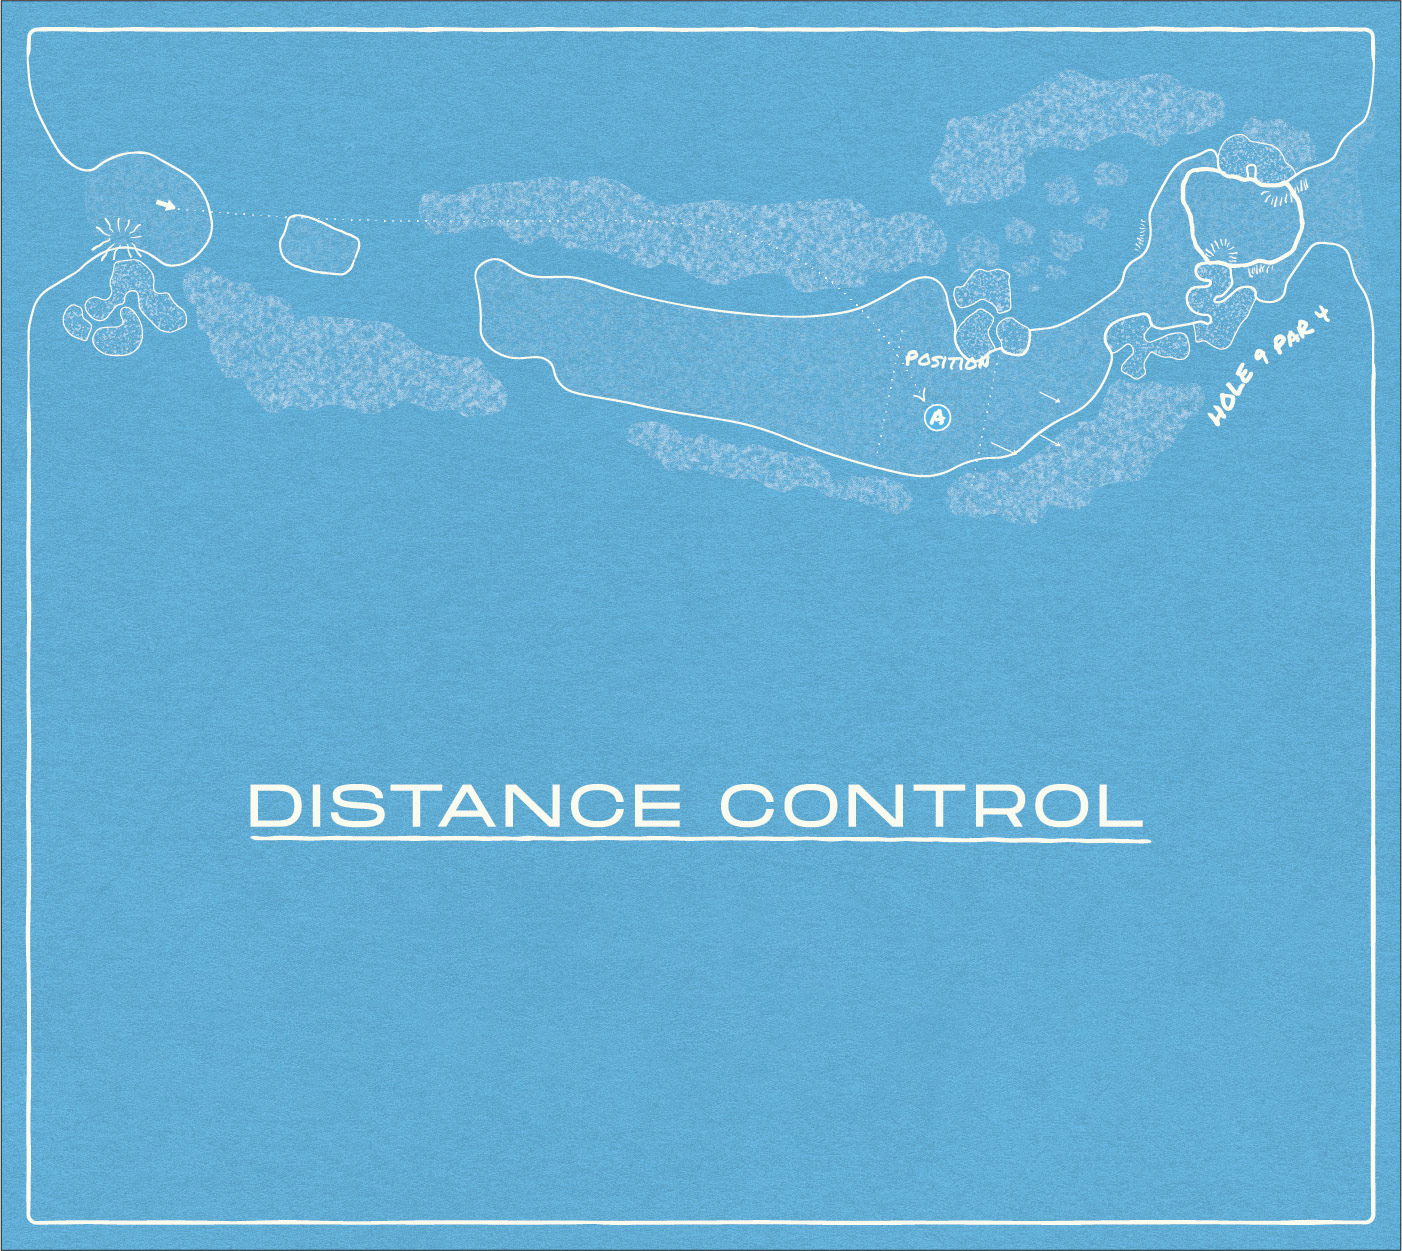
Distance Control

There are plenty of tee shots at Kingston Heath where distance control is paramount, and the 9th hole may be the most unforgiving. A short, blind par four wrapped in dense ti-tree, the hole demands both trust and execution. Aiming at the telecommunications tower provides a solid line, but it’s your club selection that matters most. The fairway falls slightly downhill, often carrying well-struck tee shots farther than expected. Overcook it, and you may end up in the thick scrub. Leave it too short, and you’re left with a compromised angle. Get it right, though, and you’ll be rewarded with a clear, inviting look at the green. Misjudge it, and the hole quickly turns on you.

The 11th

Par 4 | 378 metres

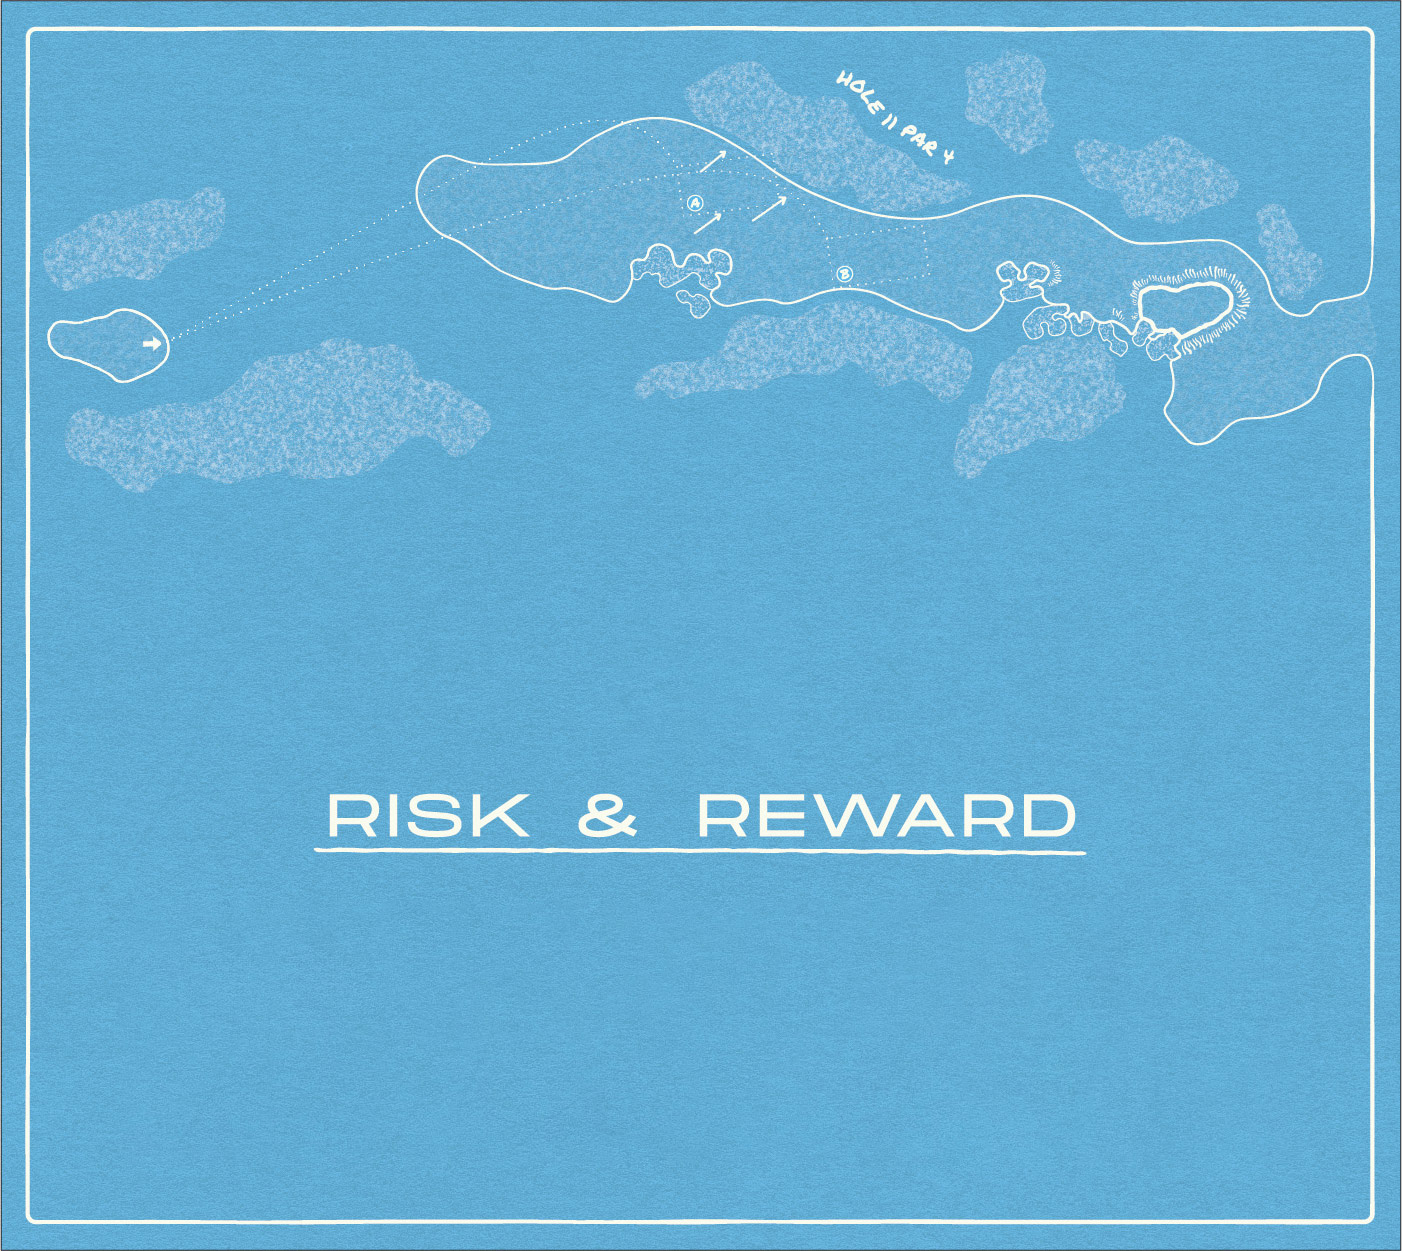
Risk & Reward

Kingston Heath rarely offers a breather, and the 11th hole is no exception. It’s one of the toughest par fours on the course, but it also presents one of the few genuine risk-reward scenarios.

Like the 9th, the fairway here runs firm in summer, especially around the corner. A conservative line out to the left leaves a long second shot into the green. But take on the bunkers to the right, and you could set yourself up for a very manageable approach.

If you miss your mark, the penalty is just as severe either way. But the reward? That could make all the difference. It’s the kind of hole that asks, not just if you can, but if you dare.

The 14th

Par 5 | 515 metres

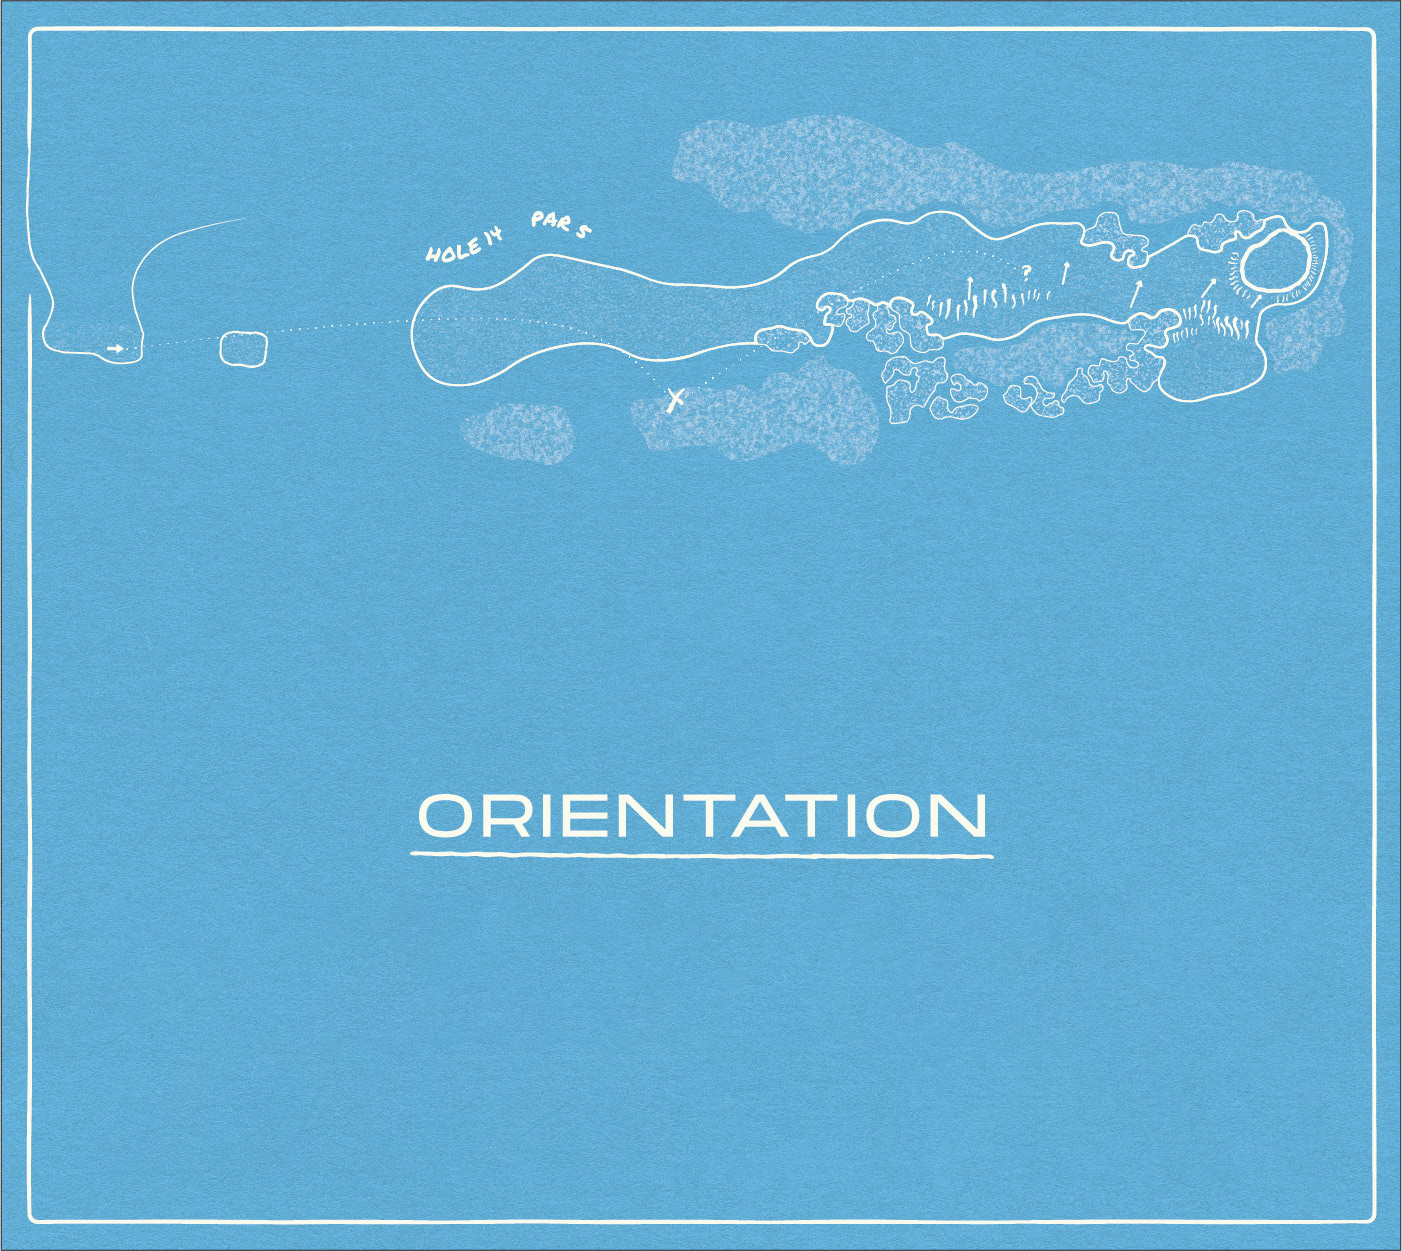
Orientation

Few holes disorient golfers quite like the 14th. The teeing ground points awkwardly to the right, making alignment a mental test before the physical one begins. A chain of bunkers runs along the right, carved into the course’s largest dune formation. Miss those, and you’re still not safe — balls often kick hard from right to left across the fairway, defying even well-struck drives.

The approach doesn’t get any easier. The green is wrapped tightly in ti-tree, cutting off the horizon and playing tricks with your depth perception. Many members consider it the hardest green on the course to read. Keep a clear head and let the ground help you; nature has a way of guiding those who pay attention.